Former arts teacher now living in the world of technology.

One of my colleagues had an idea for a leadership project to portray her students as adults and have them write about what they had accomplished in their lives.  She asked if I knew of a photo program that would age a picture.  I had no idea if there was anything out there and wasn’t optimistic but, as usual, a quick Google search led me to a solution — AgingBooth.  AgingBooth is an app for Android and it does exactly what you’d think.  It ages any person’s picture to about 70.  One of the reasons I really like the app is that it uses the same technique to digitally age a picture as I do when I am aging someone with stage make up.  I think this app could be useful in a theatre classroom as well.

Anyway, the original teacher decided not to use the app due to the extremity of the aging but another teacher (4th grade) coordinated with our media specialist to create a project where the students wrote about where they were in their lives at the age of 70.  The students were so thoughtful and creative in their descriptions of how they lived and how they wanted to be remembered.  Our media specialist helped them to research the careers they were interested in so they could write about their experiences, the work involved and how they accomplished their goals.  The final touch was adding their AgingBooth picture to their narrative.  Here is an example of one of the projects.
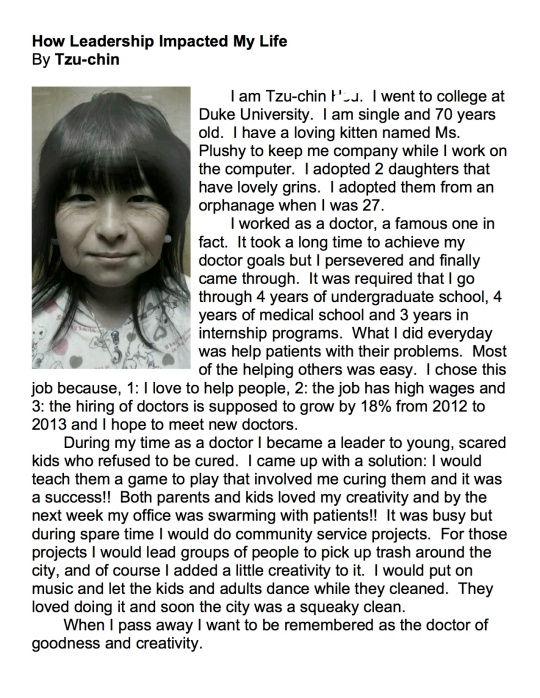
How Leadership Impacted My Life by Tzu-chin

So excited about this project with the 5th grade.  I collaborated with our 5th grade teacher who teaches science to come up with a project where the students create a website.  

This was the first time I attempted to use Google Docs with groups of students as well and there were a few glitches but all in all it was great.

We gave each group of students (groups of 3-5) a template with the sections of the website laid out for them.  The group leader made a copy of the template in Google, renamed it to their group name and then shared it with the other group members.

The group decided which section each student would work on and they all did their research and worked in the document at the same time!  It was really awesome to watch.  The only real glitch we had was that when the Google research automatically lists the footnotes they sometimes broke up a student’s work.  I think if I change the template to full pages and each student has a full page to work on rather than a section of a page that it might work better.

The teacher and I were able to go into the group documents and leave comments on what students needed to change, correct or add and the students were able to chat with us and their group members to work out questions and issues.

Once the groups were done I found it easier to just copy and paste their work onto the webpages.  At the time, our students did not have access to sites but even now that they do I think it was better for an adult to get it onto the page.  If the kids were in middle school I think they could do their own editing but just because time is of the essence I don’t know that there would be time to teach the younger students all the intricacies of Google Sites.

We are planning for the website to always be a work in progress with each group of students adding sections to it each year.  Check it out so far by clicking here – Wondering About Weather.

I just found an awesome text generator on the web!  During the Shakespeare unit another of the technology projects was for the students to choose characters from Romeo & Juliet (the play we read) and imagine what they would say if they had cell phones to text each other.  It was really neat to see the conversations that the students chose and really fun to see them mix Shakespearean language with modern texting.  (NOTB=none of thy business).

Before I found the new text generator I was using this one.  I still think this is a great tool and will continue to use it based on the lesson and content of the text.  It is a little more difficult for the younger students because they have to type in the conversation a certain way including a colon and put each text on a separate line.  It is also limited to 10 lines of text.

The new one is here.  It is much more user-friendly and would be easier for the students to type in their text.  I’m not sure yet if this one has limitations on the length of the conversation but it is also a better tool because you can add the character name (whomever owns the phone) to the top.  That way the students don’t have to find a way to include both names in the conversation.   I transferred their old text projects to the new format just because I liked it better.

Here are some examples of our R & J text conversations.

**P.S.  Just noticed as I was playing with the new program that after they create their conversation it does list some websites where they can share their creations.  One of them is 9Gag which I would keep students FAR away from and one has a curseword in the title.  I am in elementary school so I don’t think I would allow the students to use this tool themselves, however, it is still a great tool if they write their text conversations on paper and I convert them to the screen shots.

The old tool does not have anything that may be questionable and older students would probably be fine using the new tool.  You’ll have to check it out and use your own judgement.

Shakespeare Podcasts

One of the reasons I love my job as an ITF is that I can still teach the subjects I love.  Right now one of my many projects is working with a group of 4th and 5th grade,  gifted students on a unit about Shakespeare.  One of our first technology projects was for the students to choose and recite one of Shakespeare’s sonnets.

The students chose their sonnet, analyzed it for meaning on their own and then checked their interpretation with sources on the internet as well as discussing the work with the teacher.  The students then chose music that they felt best represented the mood of their sonnet and recorded their performance for the podcast.

I had the students use the Sonnets app for iPad to choose their sonnet.  This app is amazing.  I am all about free but I splurged and paid the $7.99 for this app because it is really worth it.

I used Audacity to record the students recitations and add the music.  The only thing missing was a way to fade out the music at the end because none of the songs were short enough to end when the sonnet reading was over.  There may be a way to do this and I have just missed it.  I’ll be doing some research on other tools although I do love Audacity.  Ideally, the students would have done this part of the project but they don’t have the access to do this on the student computers.  I think especially with older students it would be beneficial for the students to participate in the actual editing/creation process.  Something I need to think about when deciding what programs should be on the student computers next year.

To choose the music we used Kevin MacLeod’s site.  This man is amazing and there are so many musical choices!

I used Podbean to publish the podcasts.  It is a free site and I had used it to post some podcasts for one of my classes when I was working on my Master’s and thought it was nice looking and easy to use.

So, without further ado, here are the student’s sonnets.  I have four students in this program and at the time of this posting two of the sonnets are complete.  Enjoy!

Student Sonnet Podcasts

Third Grade Plant Projects

Our third grade team is pretty tech savvy so this was a project I was more of an advisor than actually teaching.  Again, so many ways to be involved in the student’s work.

The team was interested in adding a technology aspect to their unit on North Carolina plants.  I attended their PLC meeting and demonstrated the usual suspects for iPad use.  PixNTell, Show Me, Screen Chomp, and Funny Movie Maker.  They decided to use Funny Movie Maker as it is very different and something the students had not used before.

Another part of my job is working with our media specialist.  We frequently consult and work on projects together.  For this project she handled the research aspect and helped the students to find and organize their information.  When they were ready we helped the students to record their presentations.

After all of the presentations were recorded I did the usual and put them all into one iMovie presentation.  Here is one of the individual projects.

Bright Ideas Grant

I won another Bright Ideas grant!  🙂  I think this is my fourth.

For this one, called “The Write Stuff” I have received enough money for 4 classes of students to write their own books, have them published and receive a free copy of their work!

I did this project last year with my music students.  At that time the program was free to use but in January they were bought out by someone else so now there is a $250 minimum purchase that must be made in order for the students to receive their free books.

I’m randomly picking classes to participate.  I’ve got a 1st, 2nd, 3rd and 4/5 combo class in line for the projects.  After the students write their books and they arrive we plan to have an “Author’s Day” where the students can sign their books and read their books to other students.

The minimum purchase will allow the teachers to purchase copies of the books to use in their classrooms or to donate the books to another class room.  Our 4/5 combo class has decided to write ABC books and donate them to the Kindergarten classes.  How sweet is that?

The program we are using is called Student Publishing.  I presented about this company and the projects that you can do with them at the North Carolina Reading conference last year.  I think they are wonderful and I’m so excited to be able to offer this opportunity to our students!

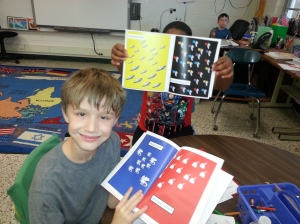
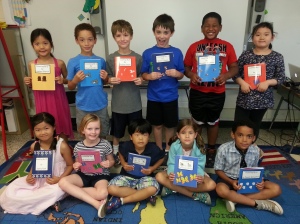
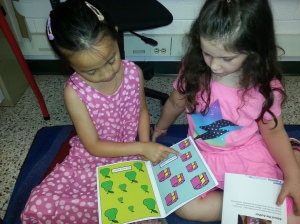
Update:  Here are some of the 1st grade students with their counting books.

20140611_113329 20140611_113931 20140611_114156

2nd Grade Graphing Project

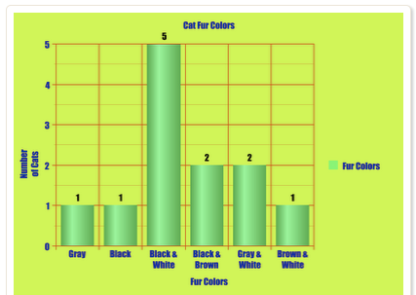
This was another project where I played more of a consulting role.  This teacher is incredibly tech savvy and such a joy to work with.  For a math unit the students studied data about Cats. Each team had 12 cats to review and they chose how they would like to organize their data. After making a rough draft graph and a final graph, students were able to create their final version via the technology resources in the library.

The teacher first asked for recommendations of graphing sites.  I had quite a list (shared below) but after consideration we felt that the best one to use was the first one (nceskids) for the feature of the students being able to email their results directly to their teacher.


http://nces.ed.gov/nceskids/createagraph/default.aspx
http://chartmaker.mathwarehouse.com/online-bar-graph-maker/
http://illuminations.nctm.org/ActivityDetail.aspx?ID=204
http://www.onlinecharttool.com/graph?selected_graph=bar
http://www.chartgo.com
http://www.hongkiat.com/blog/22-useful-chart-graph-diagram-generators/

Here is a sample of the student’s work.

Image

As I continue my experience as an Instructional Technology Facilitator I am learning that there are many different ways that I can be involved in classroom projects.  My favorite is when I can really work with the teacher and team teach an entire unit.  Unfortunately, due to schedules and time limitations that doesn’t happen as often as I would like.  The second is when the teacher begins a unit with the students and they are aware that there will be a technology component but I don’t come into the classroom until it is time for the technology portion to start.  This is still a great way to be involved with the kids and the teacher and really works better to get me into more classrooms because there is not as much time involved so scheduling is much easier.

This was one of those projects.  The students were researching endangered species and wanted a way to share their research.  The teacher and I discussed the options and definitely wanted to give the students choices in how they presented their information.  We used iPads and I introduced the students to three different apps to choose from.

Screen Chomp allows the user to upload a picture and draw and narrate at the same time, while it records.

PixNTell (one of my favorites) allows students up to five pictures (with the free version) and students can edit and draw on the pictures and then narrate a presentation.

Funny Movie Maker is so much fun to use.  It lets you upload a picture and morph your mouth into it and talk for 30 seconds.  I really like this one as well.  I learned about this app during a presentation at the NCTIES conference a few years back.

To demonstrate these apps I used AirServer again so I could broadcast my iPad on the Smartboard.  I made examples for the students to see using teach of the apps and then showed them how to use each one.  At this point they had finished their research so they just needed to decide which app would best show their information.  The class was pretty fairly split and all three apps were a big hit with the kids.

After the students recorded their projects I put all of them into an iMovie and the class used that movie to present their work to other classes and raise awareness about endangered species.

Here is one of the finished projects.

My first project this year is with a first grade class.  Their teacher wanted the students to use their knowledge of how to protect themselves from germs to teach other students some best practices.  When I joined the lesson the students already had the background knowledge.  Our plan was for the time I was with them to take 4 class periods.

Day 1 – Overview and modeling of how the project will be created, what the students will be creating and what the final project will look like.  For this lesson I used AirServer to wirelessly connect my iPad to my laptop and therefore to the SmartBoard.  I was able to show the students the PixnTell application and showed them a demo video “Mrs. Jackson’s Runny Nose” that I had made earlier.

Day 2 – Students brainstorm about different ways germs can be spread and how to prevent that from happening.

Some ideas may be:  How to wash your hands, How to cover a sneeze, How to blow your nose, How to cover a cough, When to wash your hands and What are germs?

Day 3 – Students will use a storyboard to map out what their pictures and narration will look and sound like for their movie presentation.  I always prefer that students use a storyboard to plan their projects.  I have created a simple storyboard worksheet where students draw or describe their picture on one side and write their narration on the other.  That way the student’s don’t forget what they are doing if time passes before they complete the lesson and any adult can help them complete their video because they have already written down what they want.

Day 4 – Students will use iPads and the app PixNTell to create their projects.  I love PixNTell.  It is a great app.  Lately they have increased the size of their watermark on the free version but it is free so what can you do?

For the recording process the students took turns taking and posing for the pictures, after we uploaded them into the program the students also took turns narrating their projects.  This was a great group project that allowed everyone to participate equally.

Here is one of the completed projects.

After all of the projects were complete I used iMovie to put them all together in one project for the teacher to show to the class and share with other classes.  This was a great project.


Gator News!

One other project that I was able to start at my new job is a student newscast.  I have wanted to do one for YEARS but never had the time in my schedule to do it.

Here is the link to the Gator News page of my website.  We were able to do 5 shows in our “Premier Season” and next year I hope to have a different cast of reporters each quarter do 5 shows each.

Loving this!!!

Link to Gator News:  https://sites.google.com/a/chccs.k12.nc.us/techstar/gatornews